
By Bohdan Shkliarskyi, Ukraine
Special Hobby, 1/48
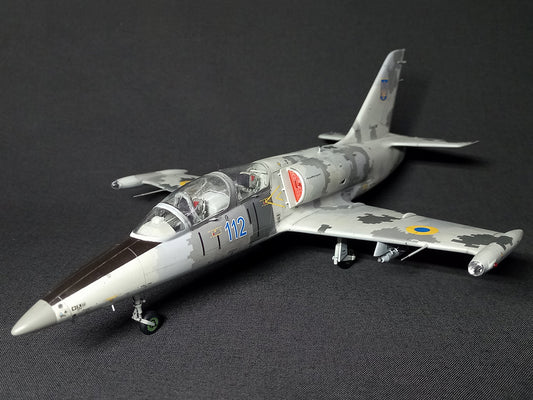
L-39: Spontaneous Choice
After completing the latest project, it was time to choose the next model. I can't quite recall why, but at one point, I felt drawn to the L-39. Perhaps because I had often witnessed the flights of these aircraft firsthand. There's something special about it. Until the last moment, I couldn't decide on the prototype; there were doubts about the camouflage scheme (green or grey pixel) and the bureau number (the final decision was made during the painting stage).
Model: Heavy kit from Special Hobby
When choosing the model, there were 2 options: Trumpeter or Special Hobby. After consulting with colleagues, I settled on the latter. This manufacturer is known for its challenging assembly, but in this case, this kit corresponded more closely to the prototype in terms of detail.

Additionally, wheels from Reskit, PE Master, resin pilot seats, decals, and masks from Foxbot and Danmodels were purchased.


Model Construction
First, the cockpit with seats was assembled and painted. I added levers in the cockpit, crafted seatbelts, and added red triangles to the headrests.


And of course, the instrument panels.

The next step was refining the fuselage.
The small air intakes on it were represented by the manufacturer as shallow recesses, which I didn't like. It was decided to rework them, also adding an exhaust pipe for the APU.


To facilitate the assembly of the fuselage, I added guides from sheet plastic since the manufacturer did not provide anything for the proper positioning of the parts, just a smooth joint without any pins.

For some reason, the manufacturer decided not to include a sight in the kit, but it is present on the prototype. It was decided to make it from scratch.


This is not the only oversight by the manufacturer regarding details. Also, at this stage, vortex generators were added under the stabilizers and a strobe light on the tail.


And here came the turning point in the model-building process. The kit included 2 pieces of vacuum-formed canopies, which were problematic to fit, with gaps and misalignments. Ultimately, the model was shelved for a long time, and there was a desire to throw it away. After some time, after careful consideration and gathering strength, I decided to order a canopy from the manufacturer and continue the work. However, even behind the canopy, there was a gap a few millimeters wide, so I had to cut and insert a piece of plastic. Before installing the canopy, I added a blind flying curtain and a cable (spring) for the ejection seat handle.


With that, the model assembly was completed. The next step was priming and painting.
Paintwork
Initially, the model was primed to detect gaps and flaws, and after correcting them, another layer of primer was applied to improve paint adhesion.

The next step was applying the pixel camouflage. It was quite a challenging task. I was mostly worried about the masks not lifting the paint. For painting, a thematic set of enamel paints from Arcus was chosen. These test paints held up excellently. There was only a lift in one place on the keel, but there the paint peeled off together with the primer, probably when degreasing the model, I missed that spot, or some other factor influenced it. I'll add that initially, the model was supposed to be painted with paints from another manufacturer, but there was a mismatch, at least in the main light color, so I ordered Arcus's Ghost of Kyiv set and didn't regret it.


Each layer of paint was allowed to dry for at least a day. Then a layer of gloss lacquer was applied, and the decals were transferred.


Since the air intakes and nozzle on the model are bare, it was decided to make plugs for them.


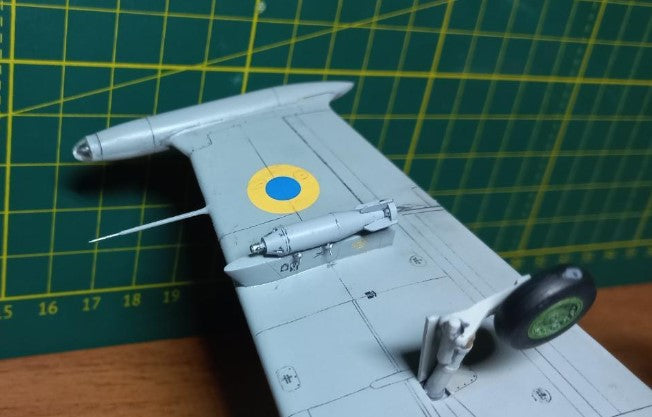
After applying the decals, a wash was made. Light gray on top, medium gray underneath. The control elements were highlighted more contrastingly.


And to prevent the pylons from being empty, handles were added to them, and P-50T from Reskit was hung there.

Results and Conclusion
So, this project was difficult and time-consuming. But despite the difficulties, the model was completed and took its place on the shelf. Not everything succeeded, not everything turned out exactly as desired. The final output you can see in the photos.
(Edited and translated by Mykhailo Orlov)